Trail Maintenance
This page is for Ashland Woodlands and Trails Association (AWTA) trail stewards and other AWTA trail workers looking for tips and hints. If you are interested in becoming a trail steward, contact us. Much of this information was adapted from the US Forest Service (we use the FS guidelines in general), but it also includes distilled wisdom from the Pacific Crest Trail Association (PCTA) and the International Mountain Bike Association (IMBA). Some of this is based on my own (Torsten’s) experience working on trails, particularly in the Ashland, Oregon area. We are fortunate in Ashland to enjoy some very workable, decomposed granite soil that forms and compacts when moist.
Different people have different approaches. Your mileage may vary. If you have a better approach for our area, please contact me.
Click here for trail work reporting. (password-protected).
Click here for AWTA larger group trail work days.
Waivers (needed before volunteers can perform trail work). Print first page of each, sign, and bring with.
NEW: Trail Boss Maintenance Day Crib Sheet. 2-page pdf. Some quick notes about things to do and not to do as a trail boss and anyone really anyone doing trail maintenance.
One Minute Instructional Videos
Tread-building basics (with text)
Tread-leveling basics (notes below video)
Fixing a hole with cribbing (notes below video)
Widening a narrow trail (notes below video)
Using Cribbing to Support a Narrow, Deteriorating Tread (notes below video)
Well-maintained trails:
-
- are relatively flat
- are devoid of dangerous obstructions, poison oak and stobs
- feature good water drainage
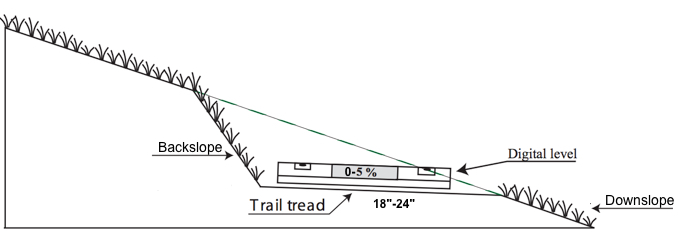
- have trail tread that is 18-30″ wide (with turns being a bit wider)
- have backslope and downslope that aren’t vertical (less erosive)
- may have small plants growing on the backslope and downslope (roots help hold soil and prevent erosion)
- clearance is 6-10′ vertically and 2-3′ horizontally
We generally follow Forest Service Class 2 trail specifications, though on City lands, especially lower, more frequented trails, we tend toward wider tread, and on higher Forest Service trails we tend toward narrower.
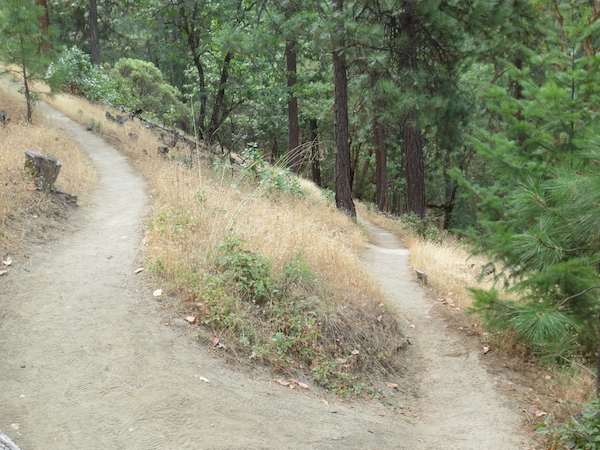
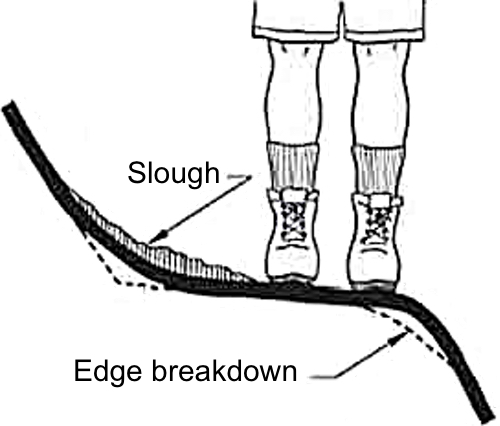
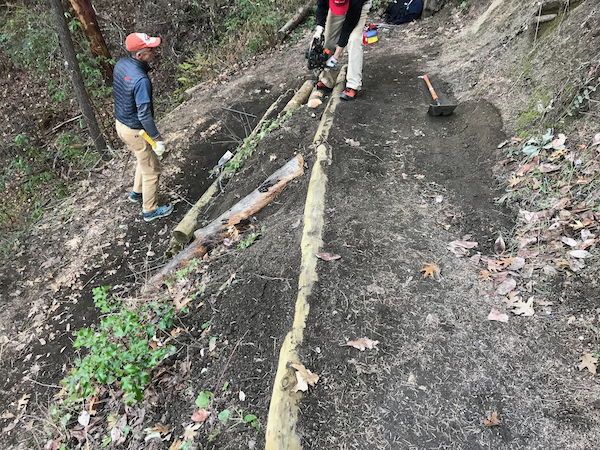
Trail Creep (slough and slump)
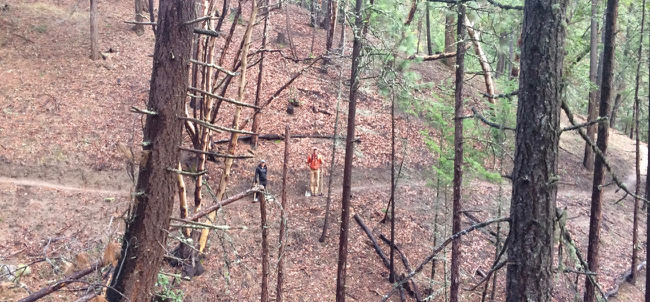
This is when slough on the inside of the trail inclines users to the outside of the tread area. The outside edge then may slump or deteriorate. So, the trail tread narrows in useable area and at the same time moves downslope and may actually widen. This is the most common problem in our Ashland trails, and is often visible on Bandersnatch, Red Queen, Wonder and virtually any trail with a steep sideslope. It may look something like this:
Addressing minor sloughing:
-
- Remove organic matter (leaves, pine needles, sticks, etc) on slough and downslope.
- Use shovel to scoop up slough from tread (but not backslope) and place soil on outside edge of trail.
- Tamp soil on tread, backslope and downslope. Make sure tread is flat.
NOTE: this process will only work if soil is sufficiently damp and devoid of organic material.
Don’t dig into backslope (area above trail) as this will remove roots holding soil and steepen the backslope and just lead to more sloughing.
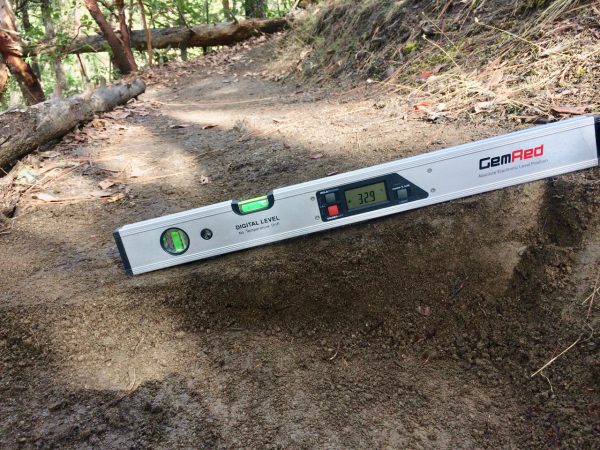
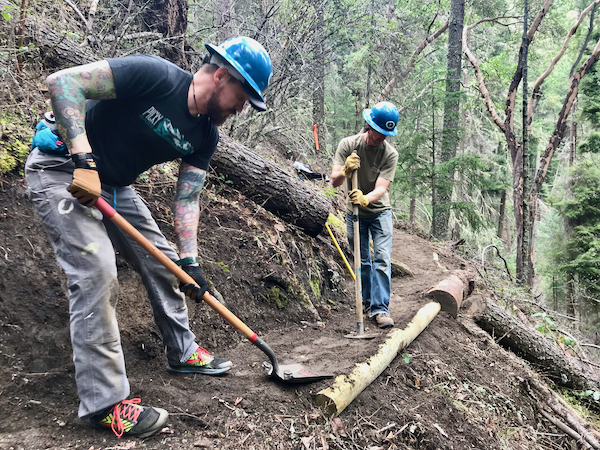
Addressing major long-term tread creep (when tread outslope > 10%)
See also: Tread-leveling basics (notes below video)
Our trails frequently acquire outslopes exceeding 10%. In the graphic below the outslope is over 30%.
- Identify where the 24″ or so tread should be and cut off the entire top layer of compressed material in the tread area. This top layer is typically like a quarter-inch thick asphalt and will tend to chip off. This really should only be done when the soil is moist; otherwise it will be tough to break up.NOTE: if you don’t shave the full tread-width of the compressed top-layer material, you will end up with some firm and some soft areas and they will wear unevenly. The old compressed material will likely stand higher than the softer and then you may end up with an in-sloped trail (because you are typically shaving off the inside area).
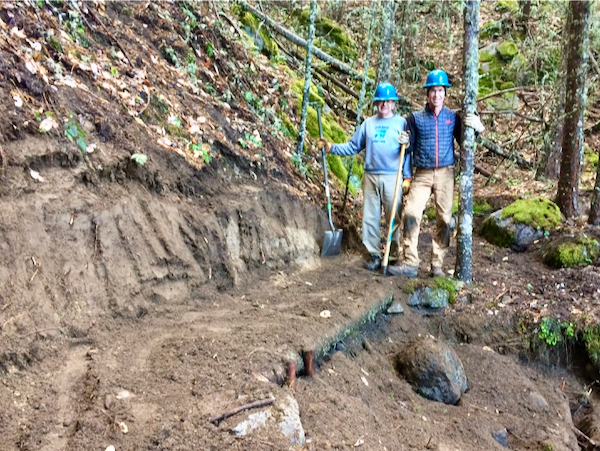
- Level the tread. This may mean removing a lot of soil. We have had to shave off 8″ or more of soil on the inside of the tread to get tread back to level. Avoid cutting into the backslope as this will just increase the sloughing.
- How Deep to Go: a 30-inch wide trail with 20% outslope will require 6-inches of removal on the inside. Slope (percent grade) = rise/run. Calculation: .20 = 6/30. A 24″ trail with 30% outslope will require 7.2 inches of removal on the inside of the trail. The math is not that important: just aim for a level tread and keep digging.
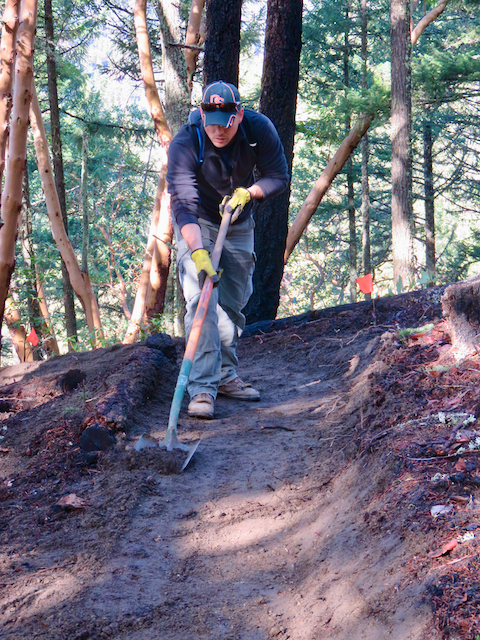
- Work inline with the tread. Shoveling parallel with the trail results in a smoother tread than working perpendicular to the trail.
- Tamp the downslope, and the outside edge and the backslope to reduce future sloughing and slumping.HINT: When you’re tamping and you feel the tool bounce, chances are you are trying to compact organic duffy material. It won’t compress. Remove the organic material and start again.
Why does trail creep happen (and how to prevent it in the first place)
Steep granite sideslopes, as we have in Ashland, naturally lead to sloughing and slumping. We have sideslopes that can range from 40 to 100% (not degrees, but percent). So, some of this trail creep is just going to happen.
However, some trail creep is due to poor construction.
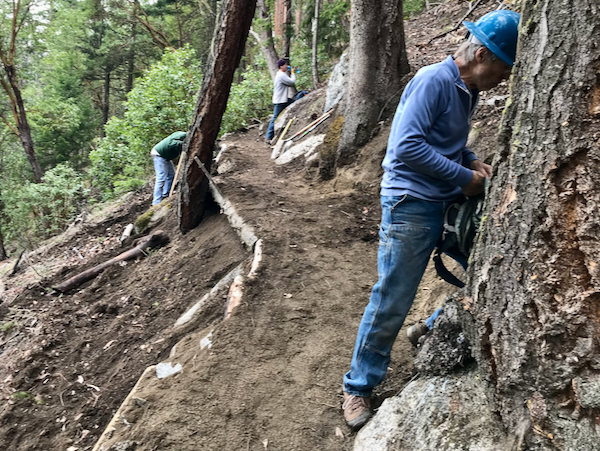
Half-bench construction
The outside trail tread is built from fill soil and is never fully tamped. It eventually collapses. This is true of some of our trails.

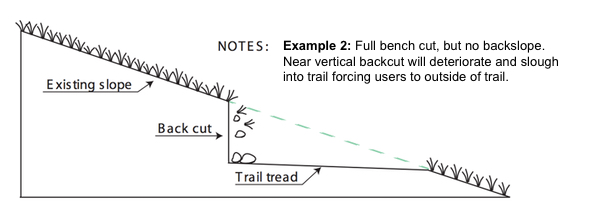
Vertical backslope
If a trail is built with vertical backslope, the sides will erode into the trail, forcing users to the outside.
Other reasons for trail creep include:
-
- the outside tread is not tamped sufficiently and may take years to truly compact. When it does compact, it is compacted on an outsloping angle.
- the downslope of the trail is not tamped sufficiently, so the trail slumps on the outside.the backslope of the trail is not tamped, so the backslope sloughs into the trail tread.
Additional thoughts:
-
- It’s tempting to remove the slough and just cut further into the hillside, ignoring the increasingly wide outer edge of the trail. That will lead to a wide trail AND the sloughing problem will continue because you’ve now re-established a mineral soil (no plants or roots) backslope.
-
- If you start with a trail that is too wide, e.g., 36″, you may want to use the outside 24″ as the tread and leave a sizable amount of the inside section of old tread and slough. That can be a good thing because the backslope no longer has as much steepness and is therefore less likely to produce slough.
-
- Sometimes a tree or a root will prevent you from digging further down and you may instead need to build the trail up and potentially out (in effect, a half-bench). You’ll still want to shave off the compressed asphalt-like top layer to blend in new soil…and then tamp the heck out of the added soil. If you build out, you should scrape off downslope organic matter, build up the soil from slough or other places and then tamp the it thoroughly.
-
- When you’re tamping and you feel the tool bounce, chances are you are trying to compact organic duffy material. It won’t compress. You want to tamp mineral soil, not old leaves and organic matter.
-
- Shaving the organic matter from the backslope or downslope of a trail to be able tamp it can be counter-productive if there are plants with well-established roots that are holding the soil. Decide whether having the roots is better than having a better tamped backslope or downslope.
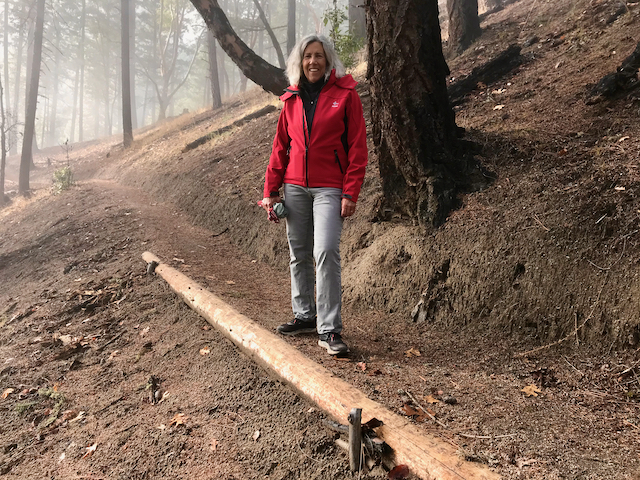
Simple Cribbing
Trail cribbing is a way of using wood or rock on the downhill edge of the trail to retain trail tread. In Ashland, we use cribbing to help:
-
- extend a trail out and away from some obstacle (like a tree, root or rock)
-
- protect the edge of a trail
-
- prevent erosion
-
- keep trail users away from the edge of a trail.
Virtually every trail in our watershed has some cribbing. Below are several examples. For instructions on building, watch Fixing a hole with cribbing or Using Cribbing to Support a Narrow, Deteriorating Tread on Youtube (and read the notes below the video!)

Problems with cribbing: limited lifespan.
Cribbing should always be considered a temporary measure. It will rot. It will get knocked down. It will burn (much of our cribbing has been burned in AFR operations). If cribbing is essential to holding up a trail, then it needs to be monitored in the same way that any infrastructure should be monitored (like old bridges). Eventually cribbing will need to either be replaced or the trail will have to survive on its own without.
If, in addition, you use rebar or some other metal to pin the cribbing, that metal will eventually become exposed and could present a hazard. Natural material pinning is desirable but is not typically as sturdy or reliable.
Problems with cribbing: cribbing can channel water.
Cribbing often stands proud of the adjacent trail and may therefore impede normal water shedding and direct water down the trail. Provide a channel for water to flow.
Problems with cribbing: rebar can be dangerous, wood pegs can be unreliable.
Rebar can work its way out of the wood it supports and become a hazard. Wooden pegs can be safer, but not as sturdy. Wood can also rot or burn.
Good Cribbing Materials:
In Ashland, madrone (native) is ubiquitous and the Ashland Forest Resiliency effort has felled many of these trees so various lengths are available. Juniper is a long-lasting wood that withstands rot longer than most materials and is available for purchase in various forms. The City of Ashland may provide juniper for city-lands trails.
Bad Cribbing Materials:
Rotten anything
Burned anything
Old fir or pine
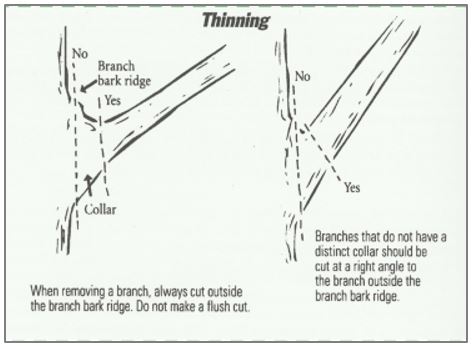
Trail Problems: Brushing
Generally speaking, the goal here is to provide safe passage along a trail. It is not to maximize sun or provide a better vista. Some ideas:
-
- cut poison oak way, way back. If possible remove entire plant.
- Think about bikers and equestrians when brushing.
- preemptively remove brush that will encroach on trail.
- cut branches to outside edge of collar (see below). If you have doubts, don’t cut.
- if cutting involves a chainsaw on city lands, please inform City Parks and Rec (Jason Minica is point person) and they will do it. Only chainsaw certified folks should attempt cuts on FS lands and only with proper PP&E.
NOTE: Do not cut trees for a better view.
Trail Problems: Downfall
General rule of thumb: if you can safely remove downed trees by yourself or a small group, do it. Otherwise, if downfall is on city lands, please inform City Parks and Rec (see trail work reporting page). If downfall is on FS lands, and you want help, please inform Torsten. On some trails, e.g., Split Rock, it is preferable to leave downfall (it’s a class 1 trail and is supposed to be primitive). If removing downfall involves a chainsaw on city lands, please inform City Parks and Rec (Jason Minica is point person) and they will do it. Only chainsaw certified folks should attempt cuts on FS lands and only with proper PP&E.
Trail Problems: Roots, Rocks and Stobs
General rule of thumb: consider NOT removing roots and rocks unless they are either a safety hazard or are causing a re-route of the trail. In some cases, removing rocks and roots removes some of the desirable wilderness character of a trail (“dumbs it down”). In other cases, starting to remove a rock reveals that it’s just the tip of the proverbial ice-berg.
Don’t touch Ponderosa roots. Use discretion on pines and firs, but don’t cut anything bigger than 3″ in diameter. Madrone roots can generally be cut (but they are really tough!). Sometimes a root is a feature.

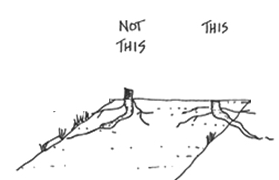
Stobs–those small stumps or pokey vertical roots that sometimes appear in the trail tread–should be cut well below grade (lower than is depicted below).
Trail Problems: Water Drainage
Water drainage is one of the main concerns of trail construction and maintenance. In Ashland, we are exceptionally fortunate to have forgiving, generally well-draining decomposed granite as our main soil. Many of our trails also have generous outslope and water tends to “sheet” off them. Additionally, we have incorporated grade reversals in many areas and water-shedding turns in others. Due to all of this, we have few puddles and very few instances of mud.
Water ruts inline with the trail are generally isolated instances. We get occasional ruts on Bandersnatch, where water’s path of least resistance is the trail itself. A few areas exhibit greater rutting and they are usually on old road beds (like Alice in Wonderland and Hitt Rd), mountain bike trails with insloped berms (BTI and Jabberwocky) and on fall-line trails (trails that are basically on the same path that water would follow).
What to Do About Drainage Issues
1. Provide some outslope. While most of our trails have outslope, trails on the flat (rare in Ashland) and ridge trails often don’t and will eventually become trough-like if they don’t have water drainage opportunities. Add outslope early to nip this in the bud.
2. Add a slight turn. Water flows down the path of least resistance and generally won’t make a turn if a less-resistant path is available.
3. Build a subtle grade reversal or rolling contour. Grade reversals are short sections of trail 6-30-feet long that change from climbing to descending, then return to climbing. The reversal shortens the water flow path along the direction of the trail and distributes the shedding of water along a wider area (unlike drainage dips which concentrate water flow in a narrow area). Building a grade reversal is obviously a more time-consuming enterprise and is best done when the trail is first designed and built. However, providing even a slightly shallower area for 4-6 feet may provide an exit for water. By shallow, we mean just a few inches lower than the trail height before and after the grade reversal.
The beauty of grade reversals and outsloping is they don’t require any maintenance. Drainage troughs, on the other hand, either fill up or become deeper. See what the Forest Service says here:
A trail with grade reversals and outsloped tread encourages water to continue sheeting across the trail—not down it. The beauty of grade reversals is that they are the most unobtrusive of all drainage features if they are constructed with smooth grade transitions. Grade reversals require very little maintenance.
What NOT to Do About Drainage Issues:
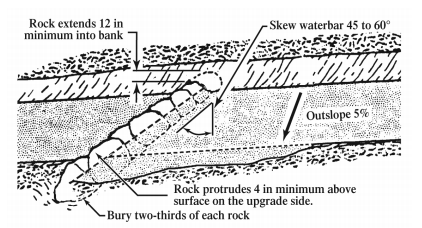
Water bars, rock bars, drainage dips, and check dams. These are abrupt deviations–often short trenches or projections across the trail– used to divert water. They may have their places on other trails but are seldom needed on Ashland trails. The city has used drain dips on Hitt Rd and on Waterline, but they are the bane of cyclists.
These can clog with debris and soil and often become (or start out as) ruts. They also tend to wear down. They almost always require maintenance, whereas outsloping and grade reversals tend to be self-maintaining. Drainage dips might be a couple feet or as little as 6-inches from end to end, and can be a nuisance to hikers, runners and especially bikers, grade reversals are 5-30 feet long and, as such, are also less of an obstacle for hikers, runners and bikers.
Sometimes, particularly on roads that are now trails, drainage dips may be necessary. Still, the making the dip less steep and wide is better than a water bar.
Here’s what the Forest Service says:
Dips Are In, Bars Are Out
For existing trails with water problems, we encourage the use of rolling grade dips or knicks instead of waterbars. Here’s why. By design, water hits the waterbar and is turned. The water slows down and sediment drops in the drain.
Waterbars commonly fail when sediment fills the drain. Water tops the waterbar and continues down the tread. The waterbar becomes useless. You can build a good rolling grade dip quicker than you can install a waterbar, and a rolling grade dip works better.
Trail Problems: Shortcuts
Trail shortcuts are often caused by humans, but possibly more often by dogs and deer (and maybe bear and cougars). While it is tempting to say that you should just cover the shortcut with logs, rocks and other debris, this seldom works for very long. The solution may have a lot to do with what is causing the problem in the first place.
Is the shortcut actually causing problems: erosion, root damage, water drainage issues? If not, maybe the shortcut is relatively harmless.
Is the shortcut a more efficient, more direct, or even a more logical route than the proper trail? There are several sections of White Rabbit where the shortcut gets more traffic than the designed route, which maybe suggests that the designed route isn’t so good. Trying to decommission those shortcuts maybe futile. Choose your battles.
Is the shortcut a prized route for someone or some creature? A shortcut between pedestrian Bandersnatch and BTI (downhill mt bikes) is used by one adamant local who is too tired (he says) to hike down the proper route; he kicks away logs and debris. Various shortcuts on Bandersnatch are quite steep and are unlikely to be used by humans. Embedding sticks and debris might help.
Shortcut Solutions:
If you think the shortcut is a real problem, here are some potential ideas:
1. Pile up debris, but also bury some of it and have it stick out at odd angles.
2. Turn over the soil (when it’s moist). Dig holes. Make it awkward to walk or ride the shortcut.
3. If the problem is really serious, talk to Jason Minica (for city land trails) or Brian Long (for Forest Service trails) about a sign. It might work…
Decommissions
Making a former trail undesirable to use may involve:
-
- returning the tread to the prevailing slope
-
- piling up debris and rocks on the tread
-
- digging randomly placed and sized holes.

Updated by Torsten Heycke 1/04/2024