The one-minute video below illustrates AWTA’s trail tread building steps (greatly simplified):
Below are the steps explained in slightly more detail (still greatly simplified). NOTE: These instructions assume that the underlying soil is moist and compactable. Building or repairing trail tread in the Ashland watershed with dry soil is very difficult.
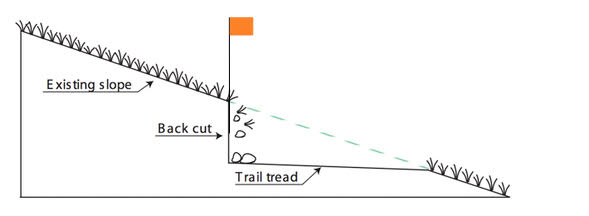
- Remove organic material several feet above and many feet below the pin-flags. Pin-flags here loosely represent the inside edge of the tread (see below for more explanation). Tools: Rogue hoe/rake or some other grubbing tool.
- Loosen the soil in the area where the tread will be, i.e., straight down from the pin flags and outward 24-inches. Tools: a pulaski is the perfect implement for this job: the adze end can be used for loosening the soil/rock while the ax end can be used to cut roots.
- Cut the tread. Toss the loosened soil well downhill. You want the tread to be sitting on a firm, undisrupted earth, not the loose excavated soil and most certainly not on top of organic matter. Working parallel to the direction of the trail lends a nice flat tread longitudinally. Push downslope loosened soil well downhill. You are aiming for a full 24-inch flat bench, so cut accordingly. Tools: flat head shovel, but you may need to use a pulaski occasionally to cut through roots.
- Shape the backslope. Ideally, your backslope is only slightly steeper than the surrounding slope. Sometimes, you may have a steeper backslope by necessity (rocks, roots, etc). The steeper the sideslope, the more erosion and sloughing will result.
- Tamp the outside edge of the trail, both on the downslope and the outside tread. Tools: a Rogue Hoe/rake works well. Whacking a shovel works if the soil is moist enough. Bonus points if you tamp the backslope (above the tread).
A few details explained
Our Ashland, Oregon watershed soils (decomposed granite) and sideslopes (steep) make some of our trail building steps slightly different than what groups in other places may do, but we still share the fundamental goals of sustainable trails and good water drainage. This is what we have found works in our area, but this is not to say there aren’t other ways of accomplishing the same thing.
Where is the pin-flag relative to the trail tread?
Some groups place the pin-flags at the outside edge of the tread, while others put pin-flags in the middle of the tread. We put our pin-flags at the inside of the proposed tread–that is close to the uphill side of the eventual tread. The simple reason is that most of our trails are on steep sideslopes (see below) and the higher the pin-flag is, the less likely that it will be raked away when we remove organic debris.
Here’s what the trail might eventually look like when done, with imaginary pin-flag hovering in the air…
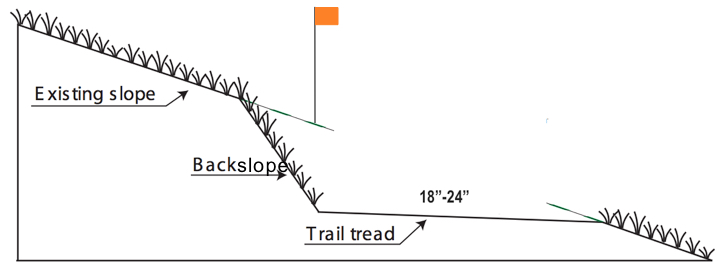
NOTE: the pin-flag locations are approximate. We try to connect trail sections in smooth transitions and attempt to incorporate grade reversals and other features as we build. On-the-spot improvisation is the nature of much trail building in our area, so in many ways the pin-flags are just broad guides.
How much organic material should we remove above and below the pin flags?
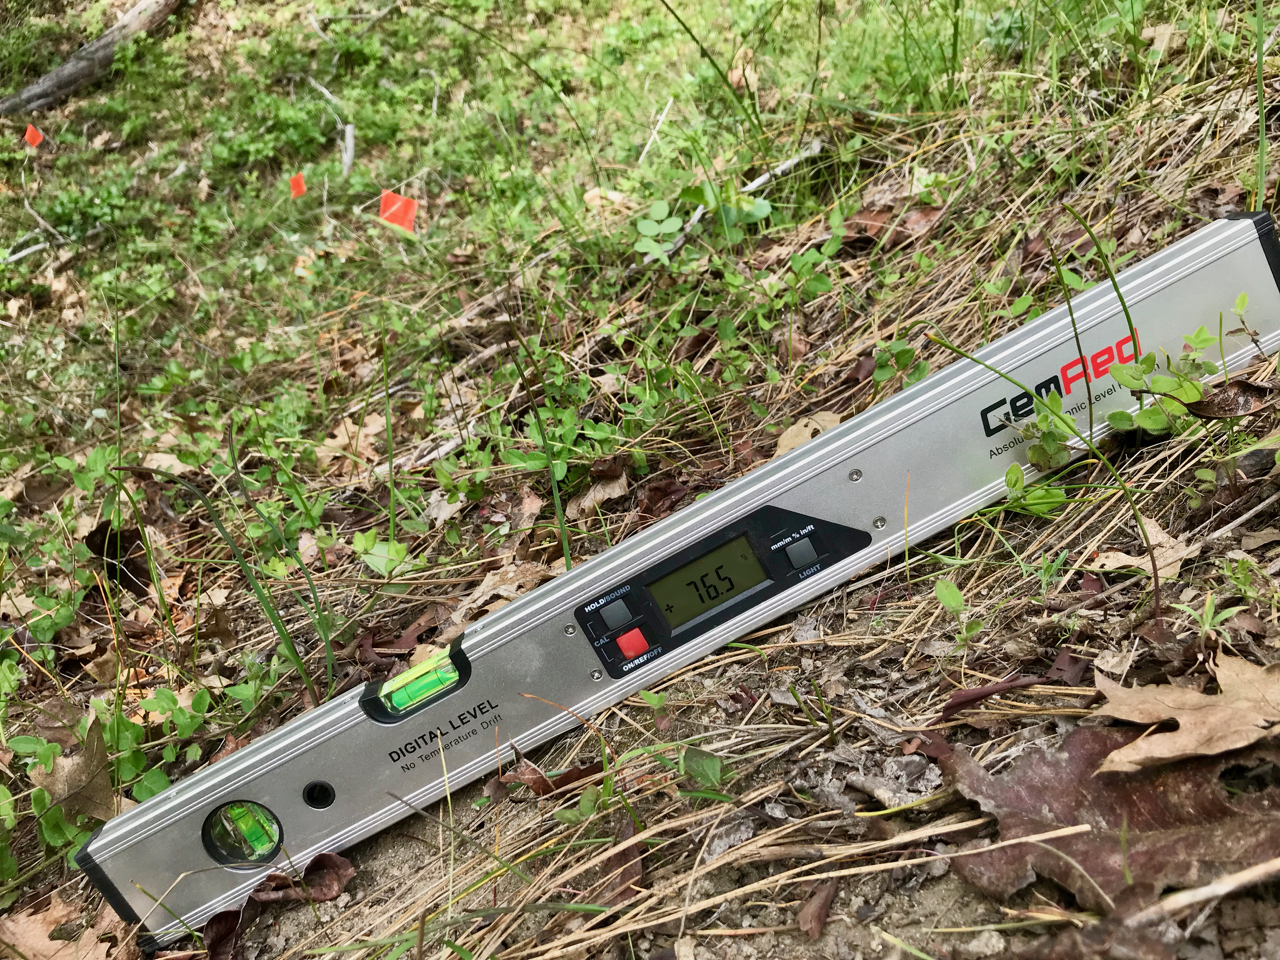
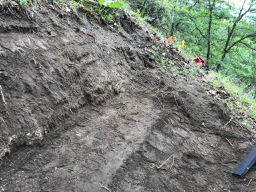
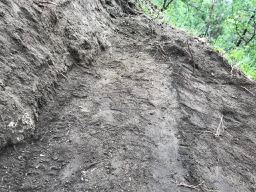
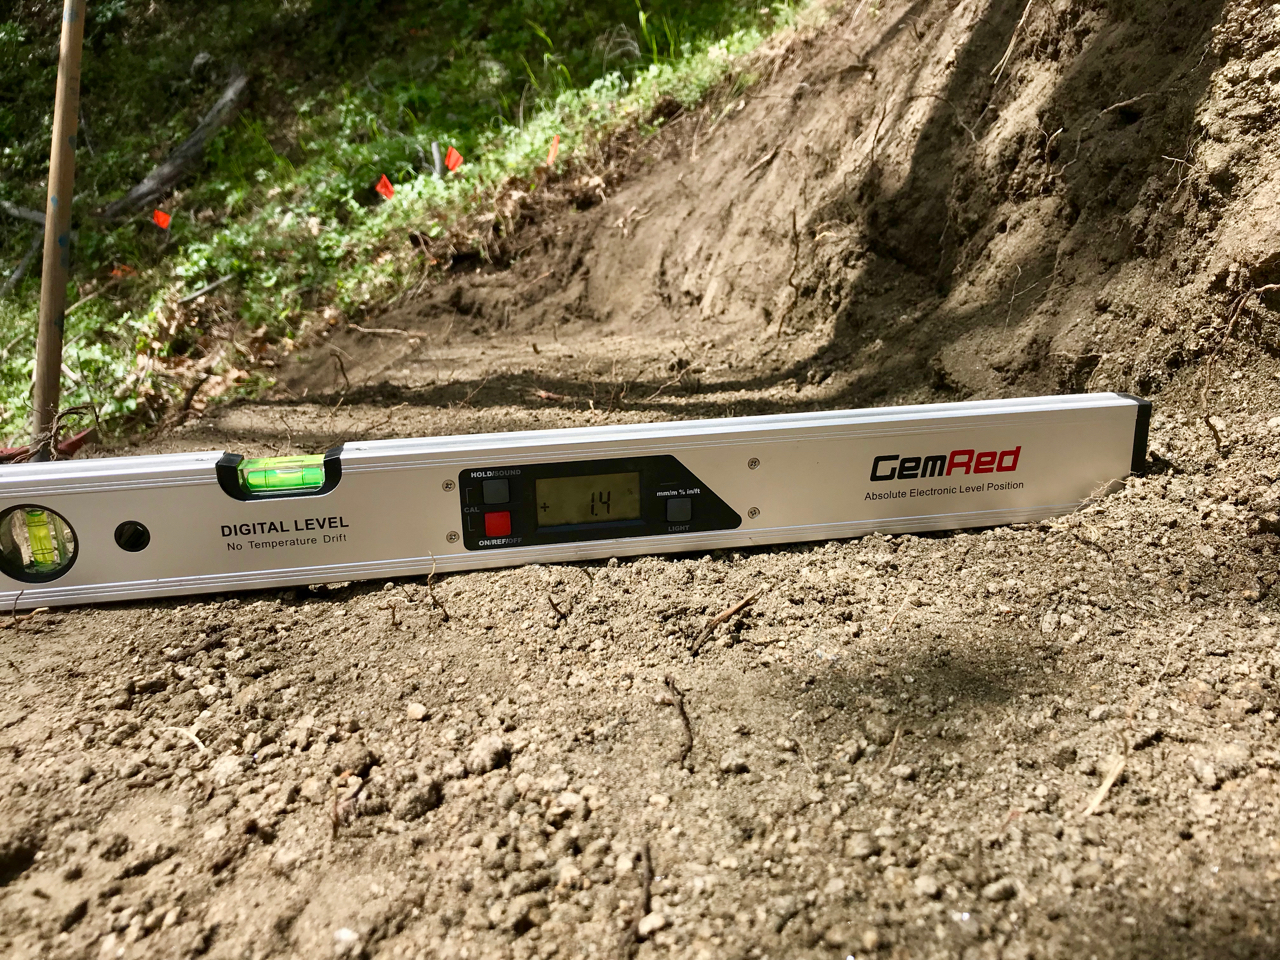
The amount of organic material we want to move is proportional to the steepness of the sideslope. If the trail were on the flat ground, you could simply rake the tread area, i.e., 24-inches or so. In the video above, the side slope is at a 76% grade (see pic below), which has different implications, about 6-8 feet worth of organic material removal.
In this case, I cleared the debris 2-3 feet above the pin flags and 4-5 feet below the pin flags. Why? We clear well above the pin flags because we know that when we shape the backslope, we will end up cutting away a big chunk of this cleared area. It’s also nice to have much of the loose organic matter removed above the cut area so it doesn’t subsequently fall into the trail tread.
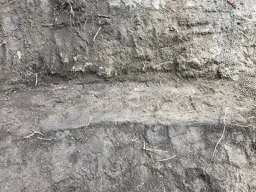
We clear well below the pin-flags to ensure that the trail is not built on organic matter or loose soil. Additionally, casting the cut soil well below the trail tread prevents the tread blending with the loose soil. When this happens you have the illusion of a wide trail, but the outside soon slumps and you end up with a very wide, rounded downhill sloping amorphous-looking hummock. Generous organic material clearing and casting cut soils well below the tread leads to a clearly defined rock-solid bench tread and there are no guesses about what lurks below the soil (see pics below).
What do you mean by a “bench” tread?
Hopefully a picture tells the story. Imagine that you could sit on the flat area created by the trail tread; that’s the bench (see below). Full-bench construction–what we try to do–is cutting the tread from within the hillside. We remove soil to reveal the bench. Think of Michelangelo carving out a statue from the marble.
Half-bench construction is when you use some of your excavated dirt to build up the outside of the tread. This is like Michelangelo glueing on David’s nose, or, um, other parts. It doesn’t tend to hold as well. Half-bench can work, but you have to really compact the soil so that it holds as well as the tread cut into the hillside. We use half-bench construction in special circumstances, for instance, when we run into a large boulder or tree roots we cannot get though. We will then build the trail out, using a lot of soil and compacting it thoroughly. We will often using some kind of cribbing–logs or rocks or both– to hold the tread in place, at least until the soils firm up.
That’s a lot of organic/soil disturbance, won’t that cause erosion?
We move a lot of organic matter, but there are still roots in the soil above and below the tread area. These help hold the soil in place. And, our experience has been that vegetation returns quickly. Typically, within a couple of years the backslope and downslope look virtually indistinguishable from the surrounding area.
Why don’t you build more outslope into the trail?
Outslope is the grade from the inside of the trail to the outside. Customary wisdom is to build trails with 5% outslope to ensure good water drainage. We build our trails as flat as possible. Why? Originally we started building our trails with the goal of 5% outslope, but we found that people were building 20-25% outslope unintentionally. If we told people 0% outslope–flat–then they tended to build with 0-15% outslope. Also, between sloughing on the inside of the tread and compaction on the outside, our trails tend to acquire more than enough outslope in a short period of time (months). Our trails seldom suffer from drainage issues and are more likely to require periodic flattening.
Why all the tamping?
When Ashland area soil (decomposed granite) is moist, it is highly shapeable and easy to compact. Over time, when this compacted granite dries, it becomes almost as firm as concrete. However, left uncompacted, the granitic soil is loose as dust or sand. Tamping the downslope and outside of the tread when the soil is moist helps the tread become rock-solid. Leaving the outslope and tread un-tamped will predispose it to fragility and subsequent erosion.
If the tool bounces when tamping, that is usually a sign of organic material lurking underneath. You’ll want to remove that organic material before continuing. If there is little to no moisture in the soil, then tamping will be less effective.
Does the soil need to be moist?
Yes. A dry-constructed trail is one that will deteriorate fast. This means the tread building and maintenance season for Ashland is largely limited to November through April with some opportunities in early May and later if there is sufficient rain. Sometimes, shaded areas and areas covered by a sufficient organic debris retain moisture in the underlying soil allowing for new trail construction later in the year.
Updated October 26, 2019 by Torsten Heycke